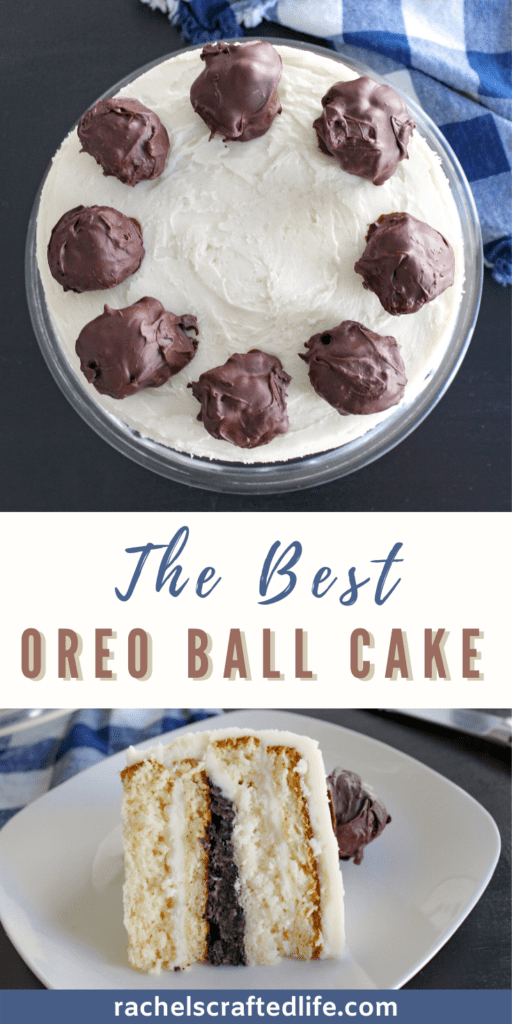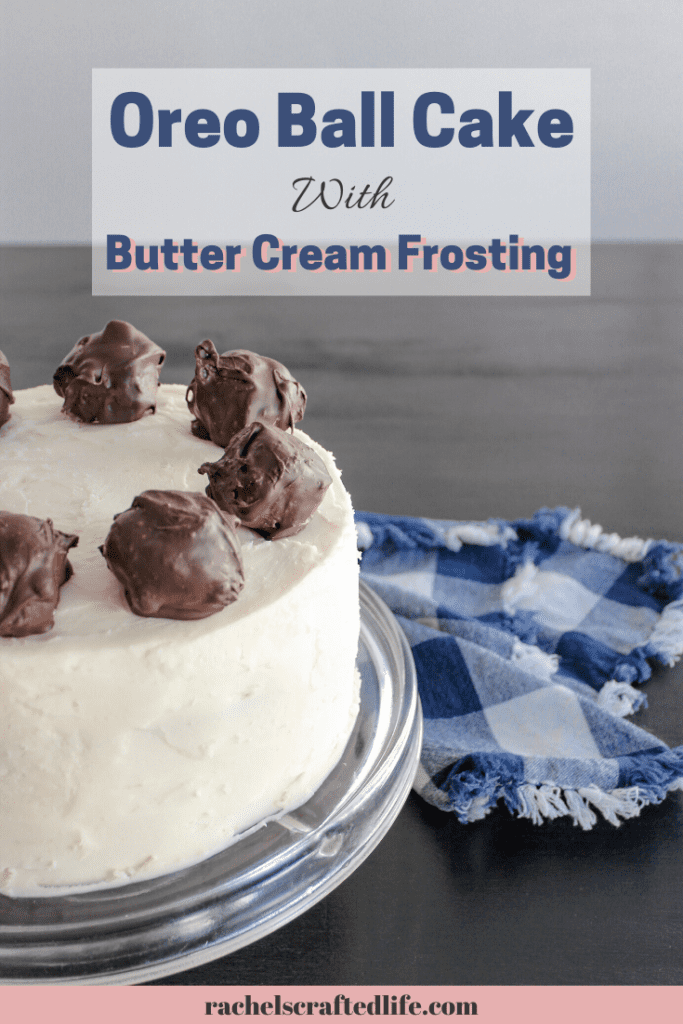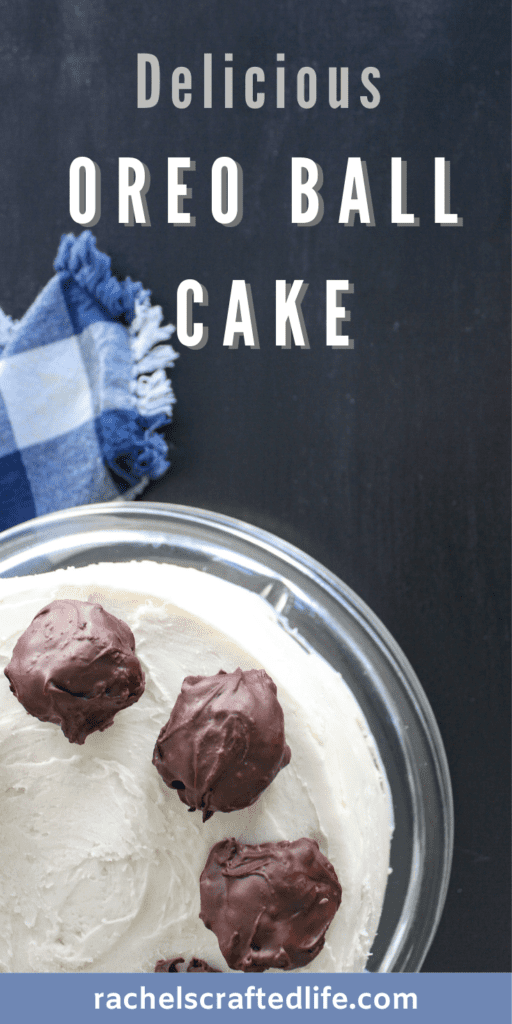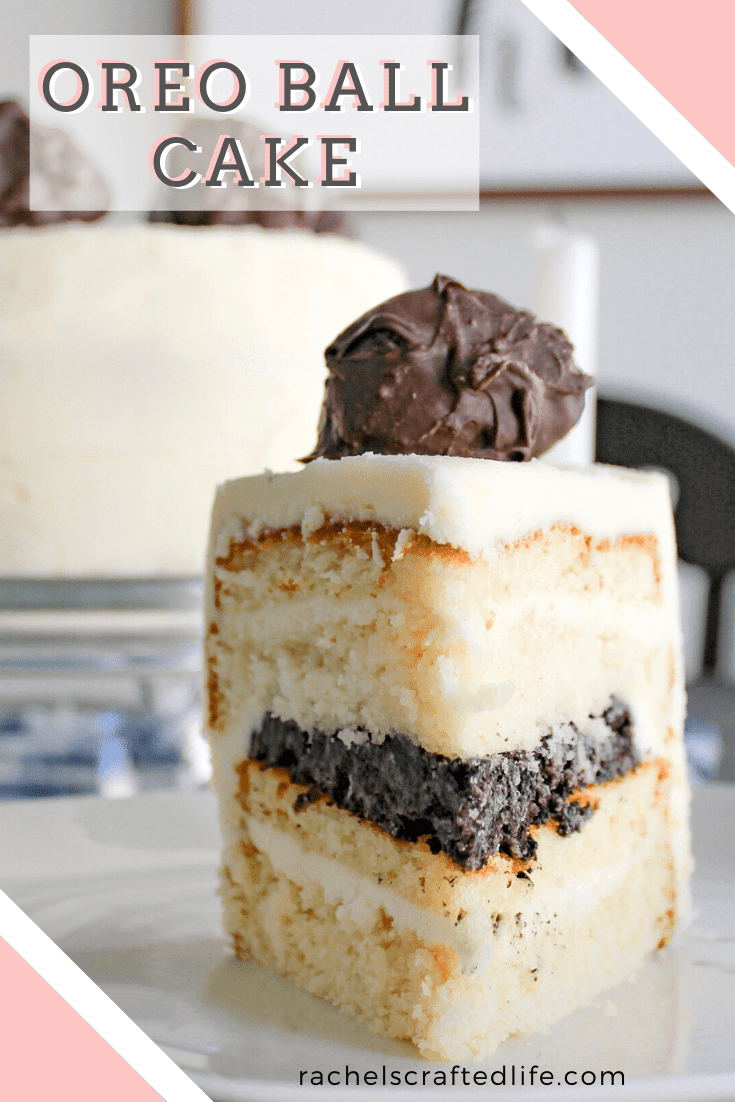
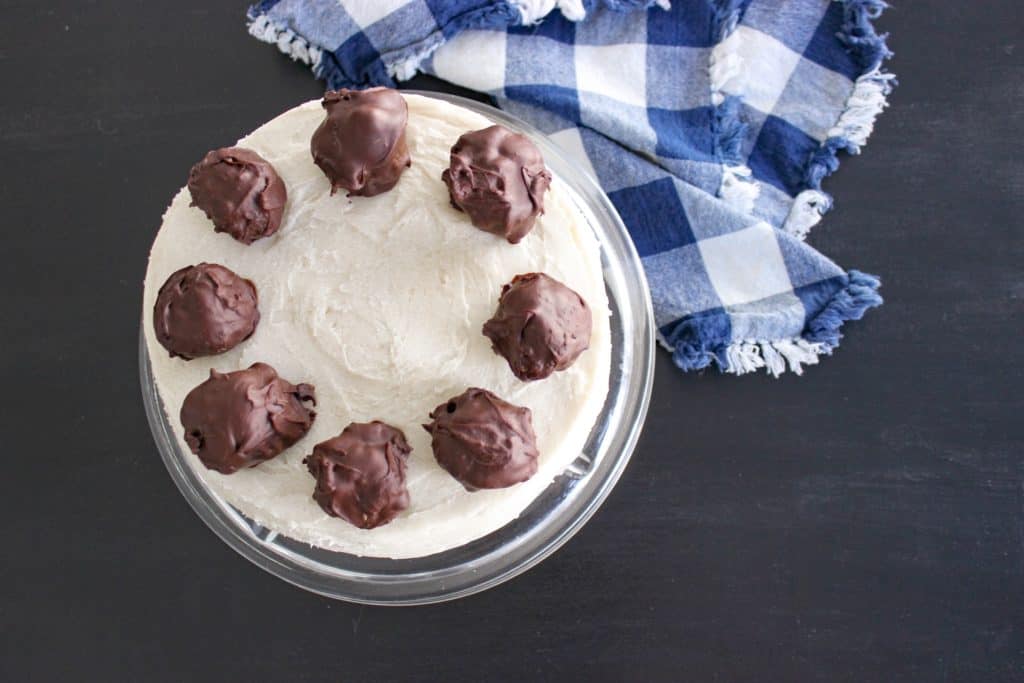
If you’re looking for a delicious cake to make for a birthday or any celebration really then this oreo ball cake will hit the spot. Made with delicious white cake and my mom’s buttercream frosting you can’t go wrong. The oreo ball filling makes for an extra special surprise on the inside and of course you can’t forget the oreo balls on top.
I made this cake for my husbands birthday as a spin off of my oreo ball recipe which is to die for. For the cake I made one batch of oreo ball filling and used about a third of the filling in the cake and made the rest into oreo balls that topped the cake and we ate some separately.
This post may contain some affiliate links. This means I make a small profit from your purchase but at no increased cost to you. Thank you!
Cake Layers
You can use cake mixes or make your cakes from scratch. It is really whatever you prefer. I was originally going to try a from scratch white cake from Cake by Courtney. However this was during the coronavirus pandemic so my grocery store was out of flour.
Luckily they had cake mix left so I used that instead and made my cake from boxed cake mixes. It tasted absolutely delicious still and was a lot better than no cake!
I still want to try Courtney’s recipe sometime though so feel free to give it a try instead of a box mix if you’re feeing extra fancy.
Ingredients
Cake Layers
- 2 Boxes of Cake Mix
- Water
- Vegetable Oil
- 2 Eggs
Oreo Ball Filling + Oreo Balls
- 1 Family Size box of Oreos
- 8 oz Cream Cheese
- 2 Cups Chocolate Chips
Read the Recipe: Oreo Ball Recipe
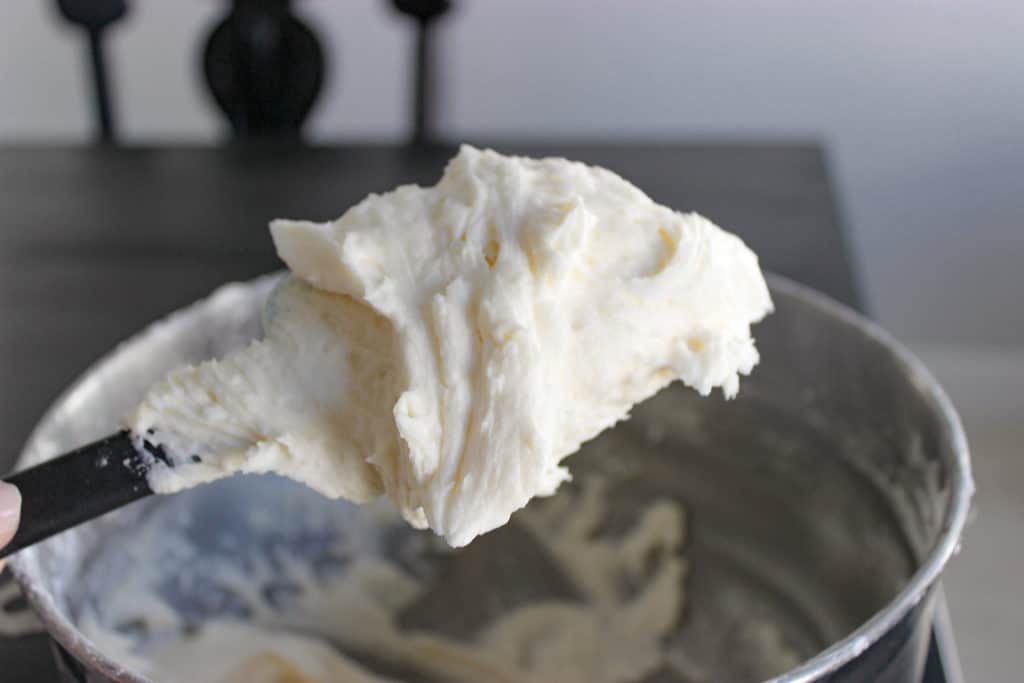
Butter Cream Frosting
I multiplied this recipe by 6 to get enough frosting to cover the entire cake and fill between layers.
- 1/3 C Butter
- 2 C Powdered Sugar, Sifted
- 1/2 tsp Vanilla
- 1-2 Tbs Milk
- Optional: 1/2 tsp Almond Flavoring
More Cake Recipes:
Instructions
Time needed: 2 hours and 45 minutes
- Bake the Cake
First thing is to bake the cake layers. You need two circular cake layers. Simply follow the instructions for whichever cake you chose to make.
I recommend making the cake at least a day before you decorate it. You can store it in the fridge wrapped in plastic wrap. - Make the Oreo Ball Filling
Crush up the oreos then add in the cream cheese. Mix them together thoroughly. Set aside about 1/3 of the filling to go into the cake.
- Make the Oreo Balls
With the rest of the filling roll it into balls and place on wax paper. Let them chill for 20 minutes in the fridge. Melt the chocolate chips in the microwave. Start with one minute and then heat them up in 30 second increments until smooth.
Then cover the balls of filling with the melted chocolate and place back on the wax paper. Keep in the fridge until eaten. - Make the Frosting
Beat the butter in a mixer until creamy. Once smooth add in the sifted powdered sugar 1/2 cup at a time while continuing to mix. Next add in the vanilla, milk and almond flavoring and beat until creamy. The frosting should form soft peaks. If it is too thick add milk, if it is too runny add more butter and sugar. Taste test it to be sure it tastes to your liking. Add more sugar if needed.
- Cutting the Layers
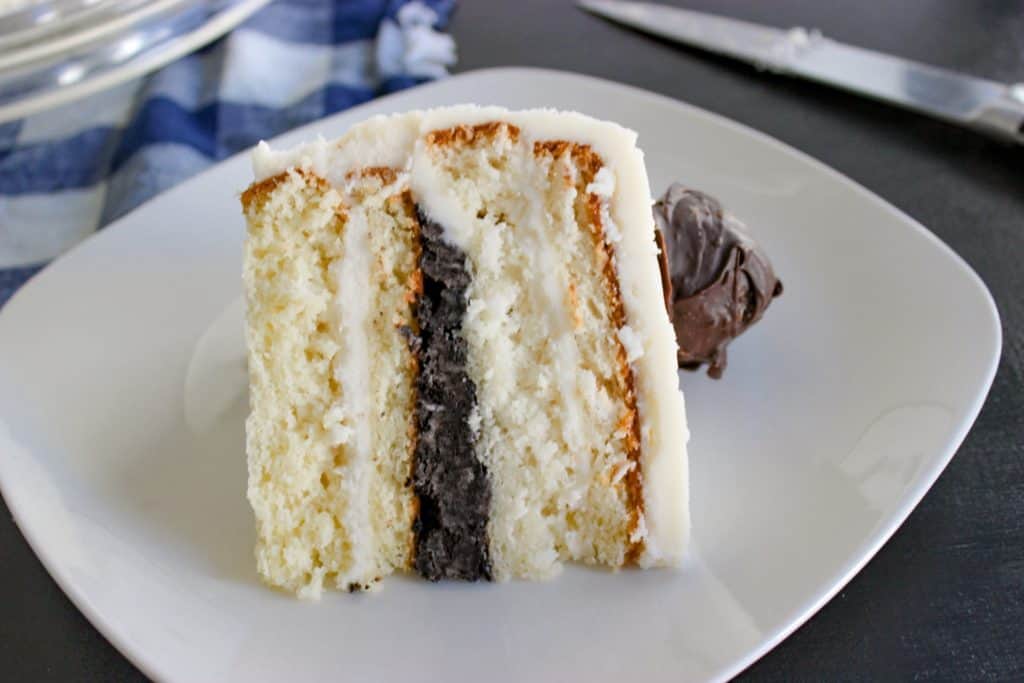
Take your two cake layers and cut the cake layers in half. This is easiest with a leveler but can be done with a knife. Try and make them as even as possible so that you end up with four equal cake layers. It’s ok if its not perfect, it will still taste just as good in the end.
- Stacking the Cake
On your cake stand put a dob of frosting in the center and spread it out slightly. This will keep your cake in place and avoid sliding and moving. Then put the first layer of cake down.
Now put a layer of frosting evenly on top of the cake. Then put down the next cake layer.
On this cake layer put the oreo ball filling that we set aside earlier. It should be room temperature and spread easily. Around the edge of the filling pipe a border of icing to keep it in place.
Now place the next cake layer and do another layer of frosting.
Finally place the last cake layer on top. - Crumb Coat
Now coat the whole cake with a crumb coat of frosting. This is a very thin layer of icing to catch all the cake crumbs, hold everything in place, and make our final layer of icing look perfect.
- Freeze the Cake
After the crumb coat stick the whole cake in the freezer for 20 minutes. This will allow the crumb coat to harden and make the next step much easier.
- Frost the Cake
Next take the cake out of the freezer and frost the cake generously with frosting starting with the sides. Make it as even as possible and you can go for a rustic look like I did or use a scraper to get very smooth sides.
Then Frost the top of the cake. - Top with Oreo Balls
Finally take the oreo balls you made earlier and place them on top of the cake around the outer edge.
There you go, a delicious oreo ball cake to share!
Oreo Ball Cake
The oreo ball cake was a huge hit! Both my husband and I loved it as well as some friends we shared it with. I know it will be a huge success for you as well.
To be notified about new recipes, money saving tips and travel guides make sure you subscribe to the RCL newsletter. Simply submit your email in the sign up box on the side bar (down below in mobile view). Then you’ll never miss out on a new post again.